Set login via Microsoft ADFS and Single sign-on (SSO)
Set login via Microsoft ADFS and Single sign-on (SSO)
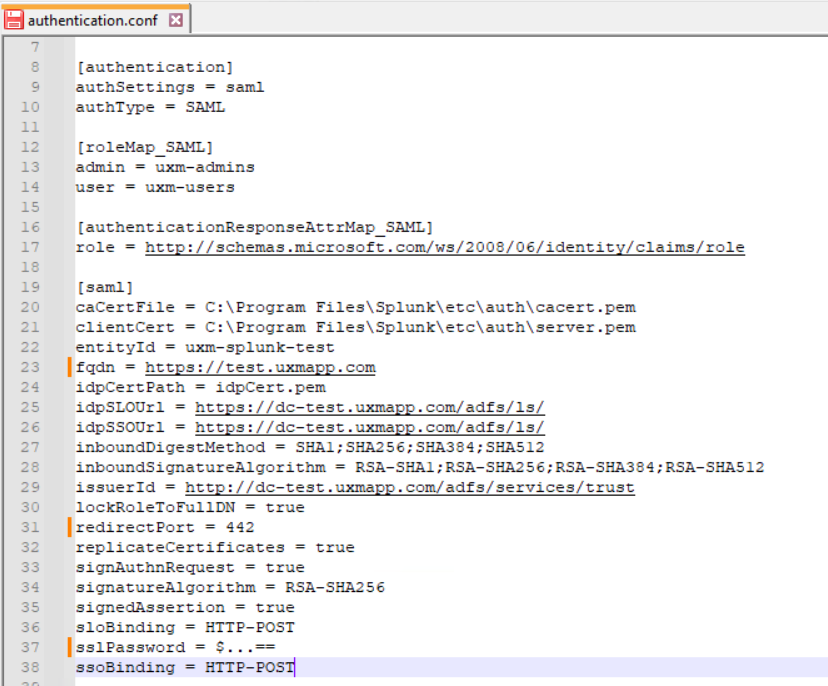
Configure Splunk HTTP's cert and endpoint urls
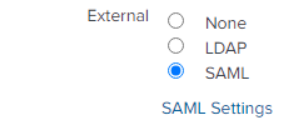
Login to Splunk and select Settings -> Authentication Methods
Select SAML and click "SAML Settings"
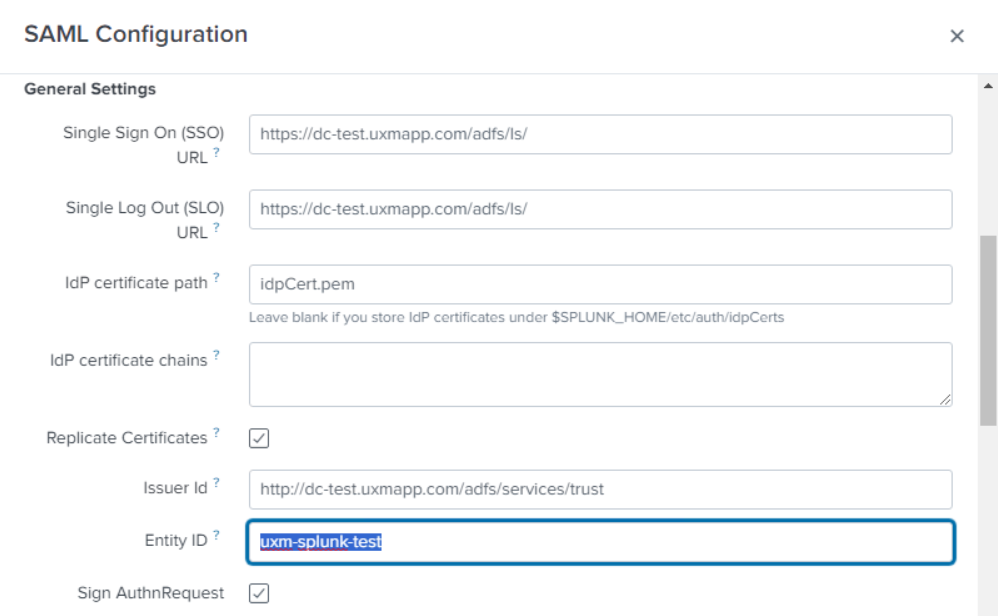
Click SAML Configuration button if the configuration dialog doesn't auto show.
Download the Metadata file from the ADFS server, url is normally https://fqdn/FederationMetadata/2007-06/FederationMetadata.xml
Import the "Metadata XML File"
Update:
- Entity ID: naming sheme required by organization, for example "uxm-splunk-test"
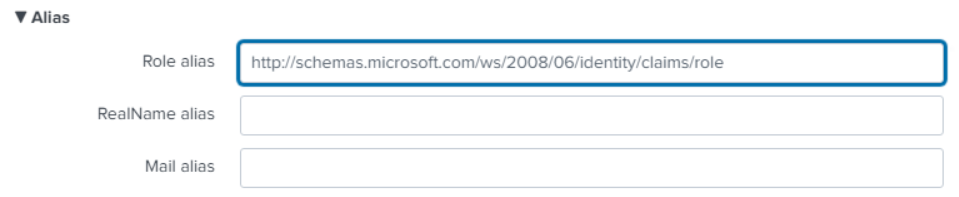
- Set Alias -> Role alias to http://schemas.microsoft.com/ws/2008/06/identity/claims/role
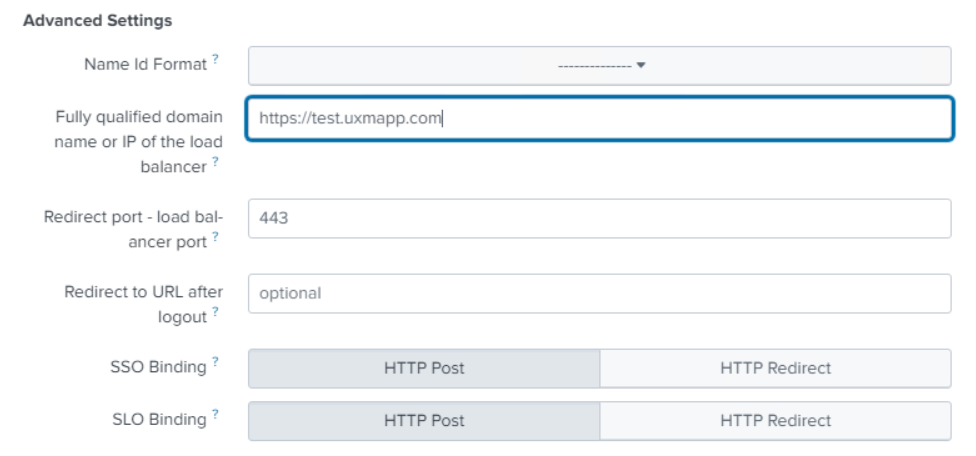
- Set Advanced Settings
Name id format: --------- Fully qualified domain: Domain name that SH webserver runs as
Redirect port: 443 or custom port used
SSO/SLO Binding: HTTP Post
SHA1 is used by default, SHA256 have to be select by editing $SPLUNK_HOME\etc\system\local\authentication.conf and setting signatureAlgorithm to RSA-SHA256
signatureAlgorithm = RSA-SHA256
Change caCertFile and clientCert if not using the same as Splunk backend systems.
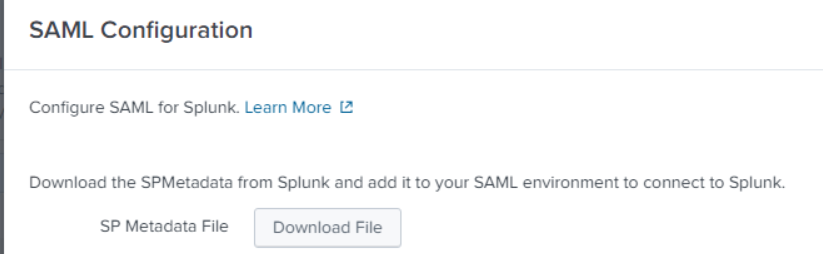
Export
Export Metadata file by calling https://fqdn/en-US/saml/spmetadata or logging into Splunk and selecting Settings -> Authentication Methods.
Select SAML and click "SAML Settings"
Select Configure SAML and select Download File
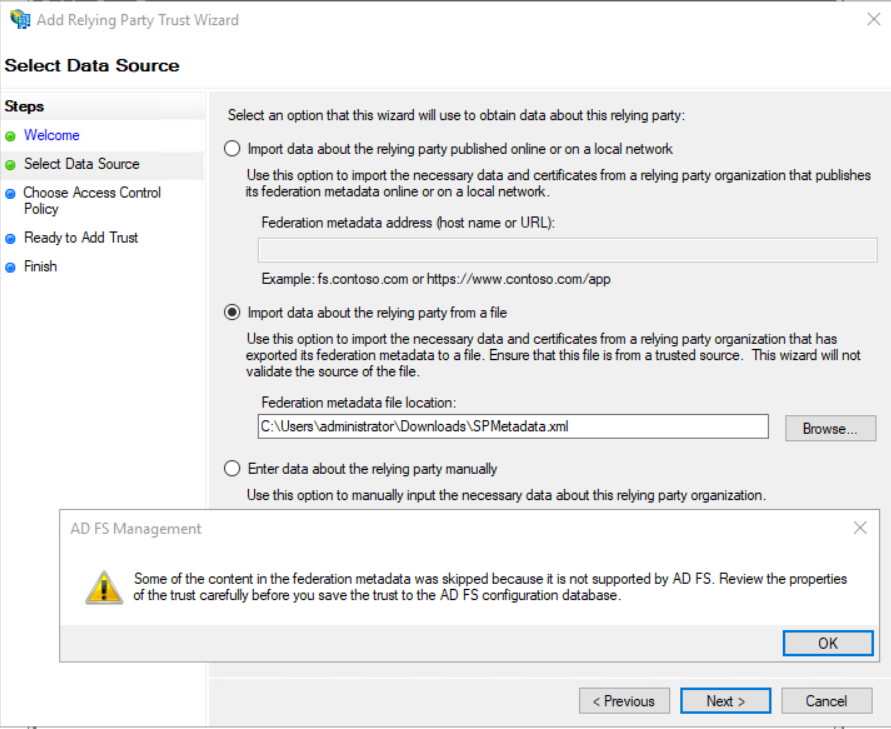
Setup ADFS - Replying Party Trust
Customer need to setup relying party trust in their ADFS environment:
-
Add new Relying Party Trust
- Select claims aware
- Import exported metadata file from Splunk, it can warn that some properties couldn’t be imported
 3. DisplayName:
ADFS display name: UXM Splunk Test or Prod ADFS
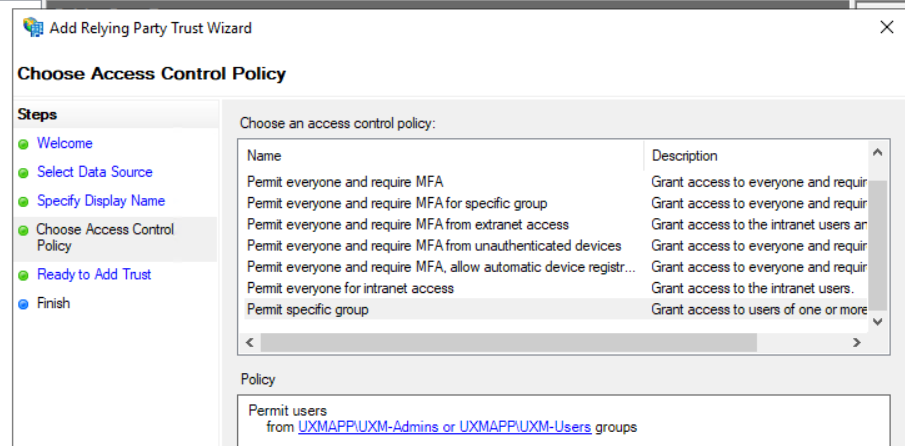
Notes: ADFS SSO for UXM (Splunk) running at https://customername.uxmapp.com/ 4. Access Control: Permit following groups:
Add the AD Groups that needs access to UXM, Groups can be mapped to Splunk roles which can be used to limit access to data and dashboards.Normally an UXM-Admin and UXM-Users group is created as minimum and can be split into Prod and Test groups.
 5. Edit new relying part
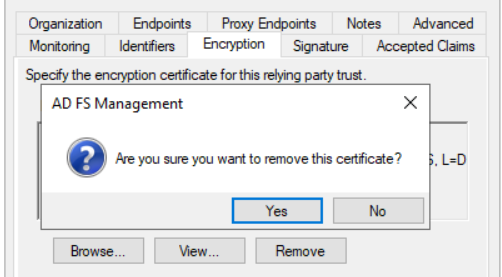
- Remove Encryption
Click Encryption tab and press Remove and Yes to remove encryption certificate. Data is send secure via HTTPs encrypted request.
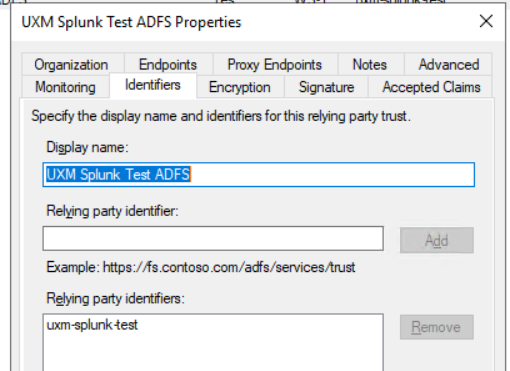
- Verify relying party identifier
Click Identifiers and verify that the identifiers uxm-splunk-test or uxm-splunk-prod is in list (or naming scheme organization requires).
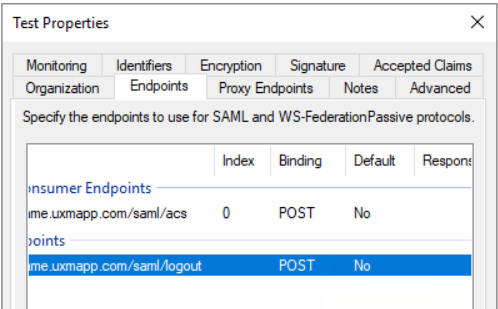
- Goto endpoints tab and verify that consumer/logout using POST binding is setup
SAML Assertion Consumer: https://customername.uxmapp.com/saml/acs
Logout endpoint: https://customername.uxmapp.com/saml/logout
Click OK to save and close dialog.
-
Click Edit claim issuance policy
Click Add Rule and select Send LDAP attributes as claims
Name: send_attr_claims
Attribute Store: Active Directory
Mapping:
- Display-Name -> realName
- E-Mail-Addresses -> mail
- Token-Groups – Unqualified Names -> Role
- User-Principal-Name -> Name ID
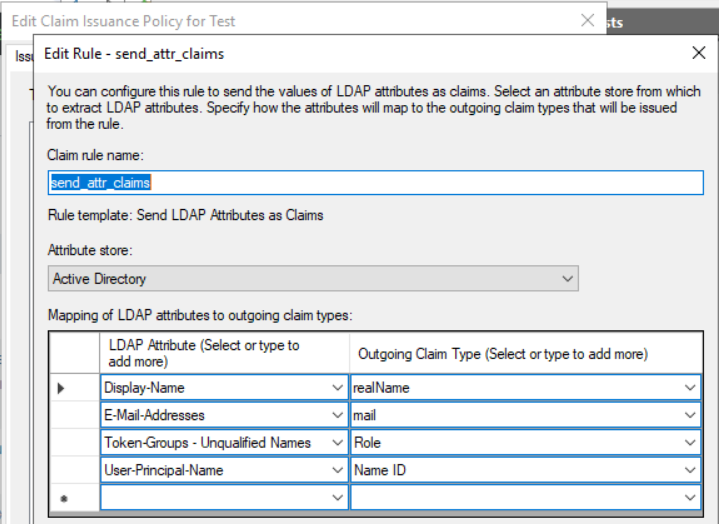
Click OK and OK to apply the claims rule