Web Agents
A Web Agent maps the received data from the user's browser via the UXM Web JavaScript that was installed on the web server into the corresponding application.
The JavaScript automatically creates the website when data is received, so the Web Agent only needs to be enabled or edited.
Accessing
Using the dropdown menu, navigate to Administration -> UXM Web Agent -> Web Agents.
When accessing the Web Agents administration page, there are 3 major elements to notice:
- Search
- Adding a new web agent
- Table of web agents
Search
In the search textfield you can search for any part of all columns. The search is not case-sensitive.
Adding a New Web Agent
When creating a new Web Agent the user is presented with following window:
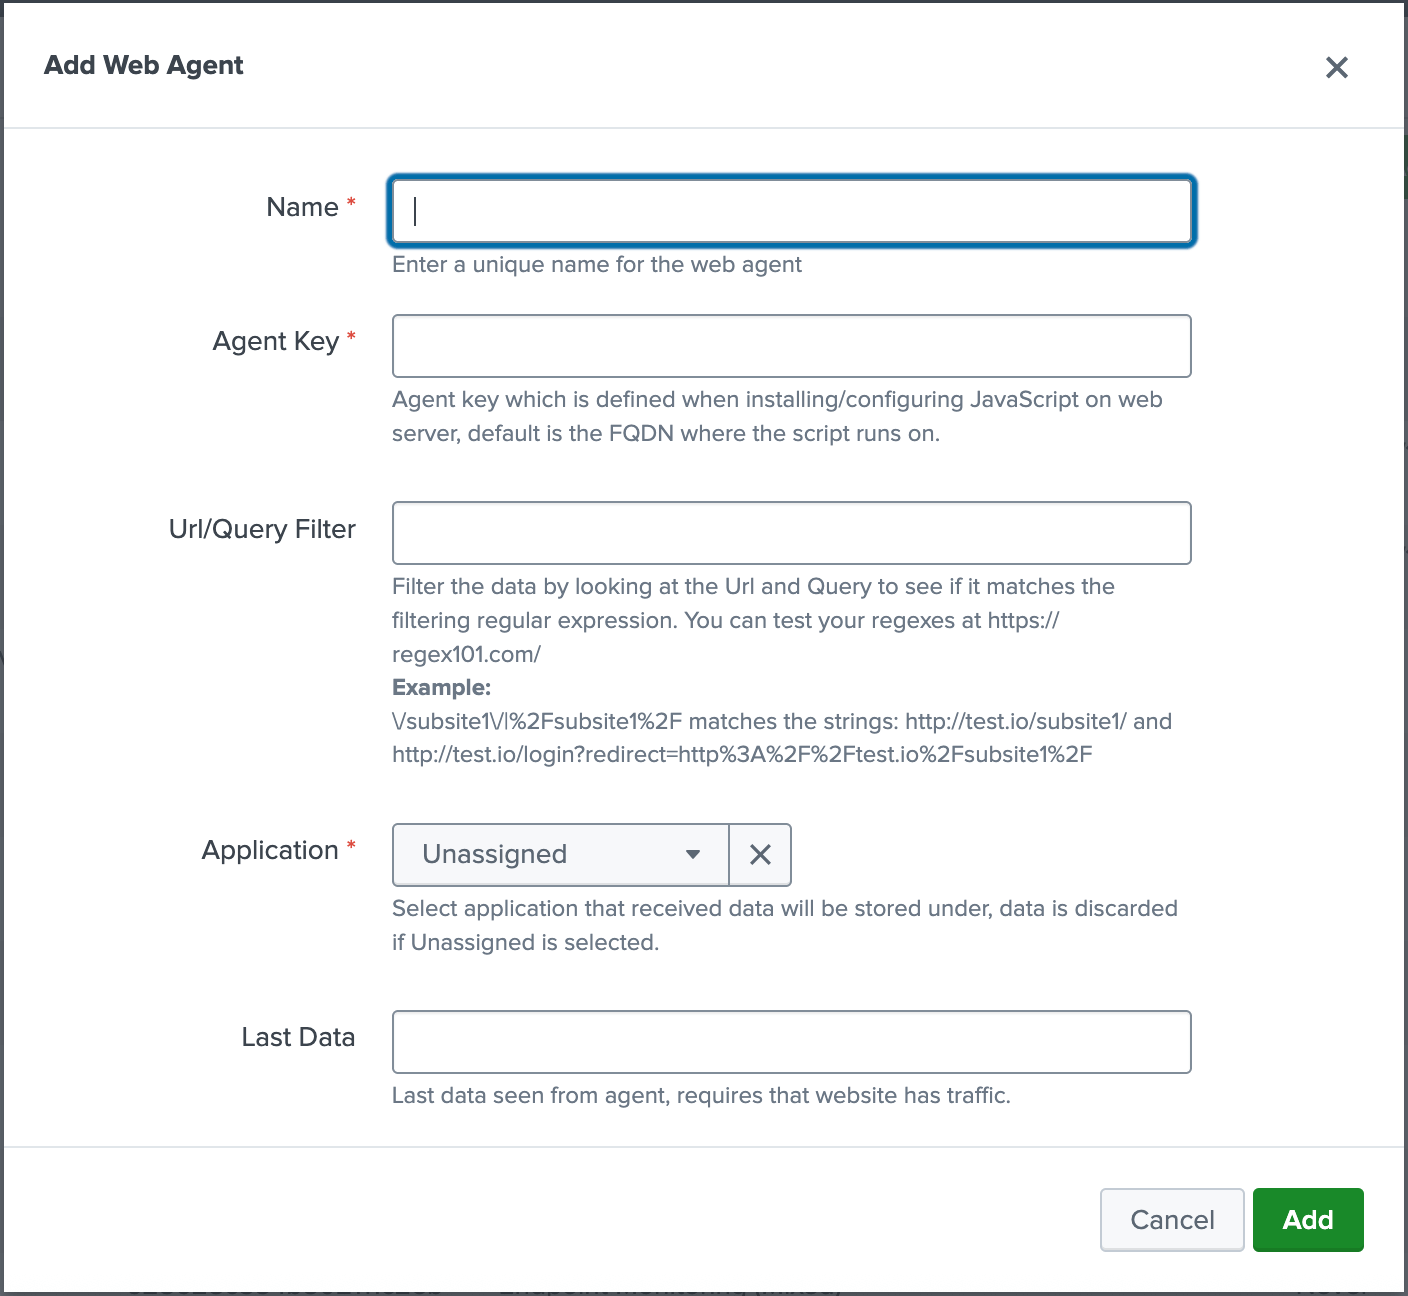
Fill out the required fields:
- Name: Should be as descriptive as possible. For example customer, name of system and if any filter is set.
- Agent Key: Is the per default FQDN for the URL that the UXM Web JavaScript runs on.
- Application: Chosen from a dropdown among available options.
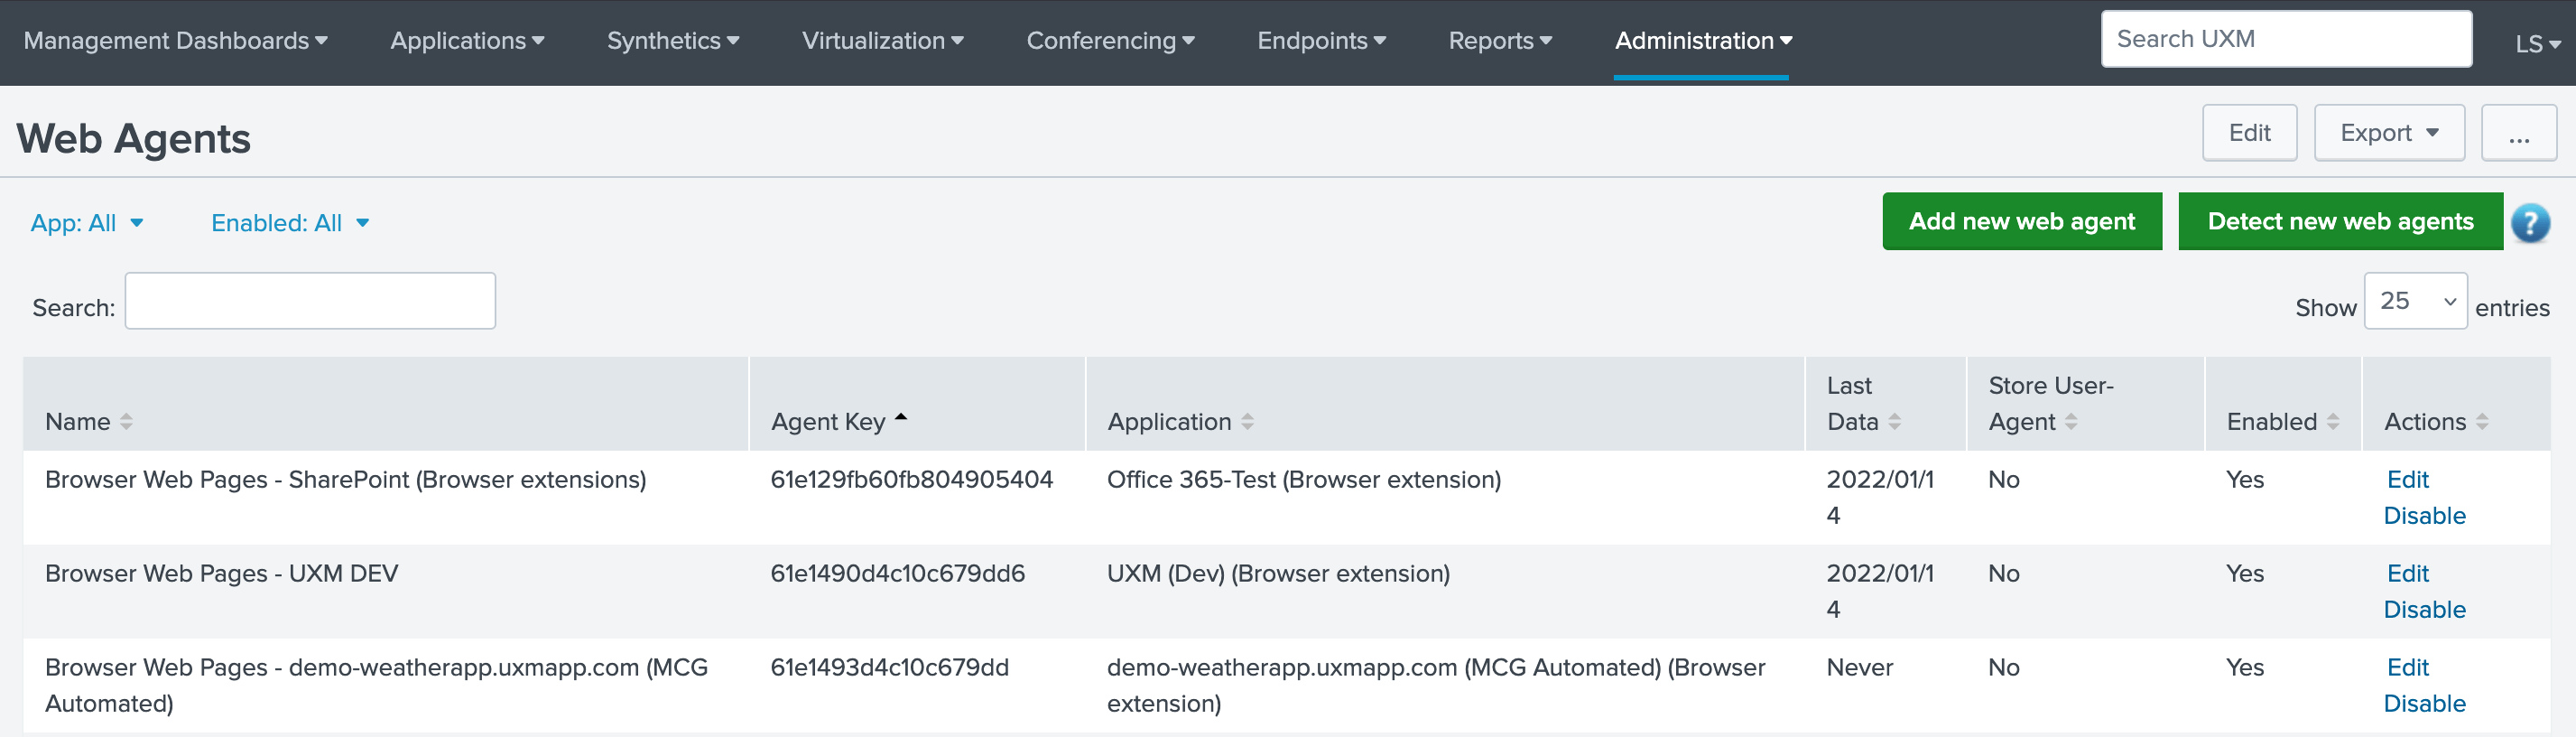
Table of Web Agents
The table consists of following 6 columns:
- Name: Name of the web agent as defined by the user who created it.
Name should be descriptive for which customer or site it works with. - Agent Key: Agent key which is defined when installing/configuring JavaScript on web server, default is the FQDN where the script runs on.
- URL/Query Filter: Filter the data by looking at the Url and Query to see if it matches the filtering regular expression. You can test your regexes at
<https://regex101.com/>Example:/subsite1/|%2Fsubsite1%2F matches the strings: http://test.io/subsite1/ and http://test.io/login?redirect=http%3A%2F%2Ftest.io%2Fsubsite1%2F - Application: Application that the received data should be assigned to.
- Last data: A timestamp of the last date where the web agent has send data. (Currently displays when the agent saw data first time, will be updated to show when data was last received)
- Store User-Agent: Yes/No boolean. If Yes, it adds the User-Agent to the collected data sent to Splunk, is No per default to save space in the Splunk Index.
- Enabled: Yes/No boolean. A Webagent needs to be enabled in order to use it.
- Actions: Here you have the option to edit the web agent if that is needed and you can also enable it.