Set login via Microsoft ADFS and Single sign-on (SSO)
Configure Microsoft ADFS Login with SSO (Splunk)
This guide explains how to configure SAML-based Single Sign-On (SSO) using Microsoft ADFS for Splunk.
Configure Splunk SAML Authentication
-
Log in to Splunk
-
Go to:
Settings → Authentication Methods -
Select SAML and click SAML Settings
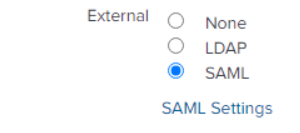
-
Click SAML Configuration (if not shown automatically)
Import ADFS Metadata
-
Download metadata from ADFS:
https://fqdn/FederationMetadata/2007-06/FederationMetadata.xml -
Import the Metadata XML file into Splunk
Update SAML Settings
-
Entity ID: e.g.
uxm-splunk-test
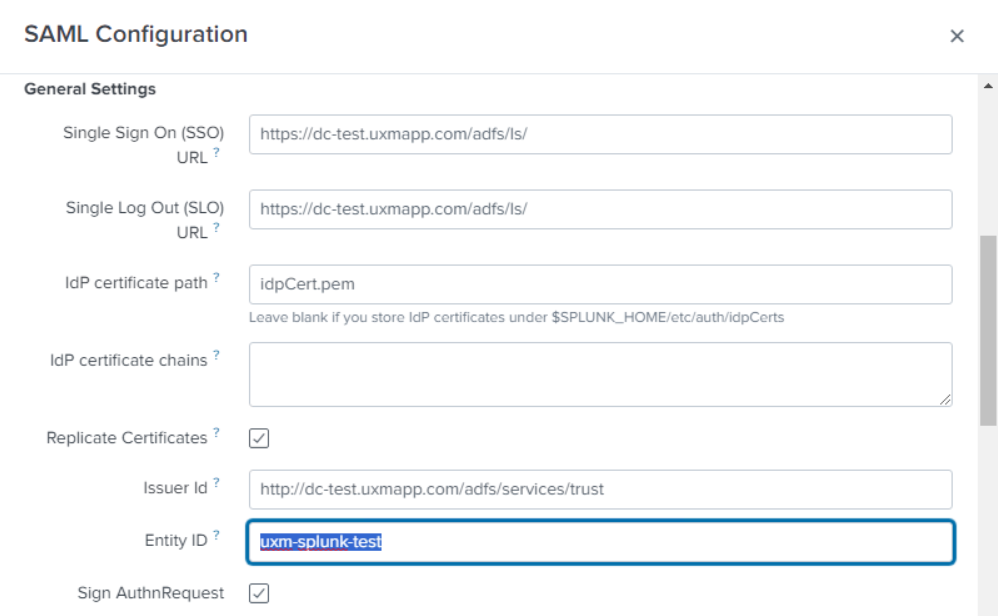
-
Role Alias:
http://schemas.microsoft.com/ws/2008/06/identity/claims/role
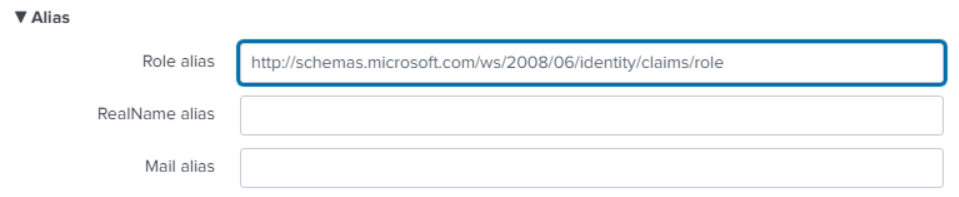
Advanced Settings
-
Name ID format: (as required)
-
Fully Qualified Domain: Splunk server domain
-
Redirect Port:
443(or custom) -
SSO/SLO Binding: HTTP POST
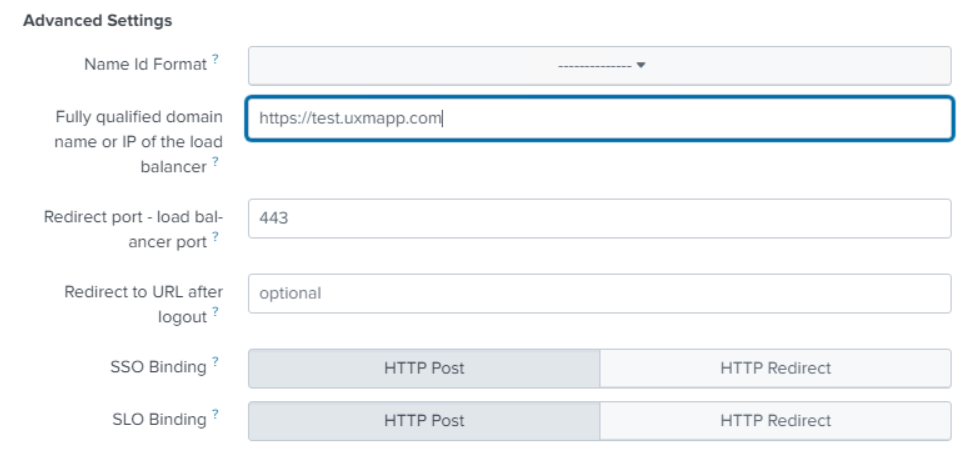
Update Signature Algorithm (SHA256)
By default, SHA1 is used. Update to SHA256:
$SPLUNK_HOME\etc\system\local\authentication.conf
signatureAlgorithm = RSA-SHA256
-
Update
caCertFileandclientCertif needed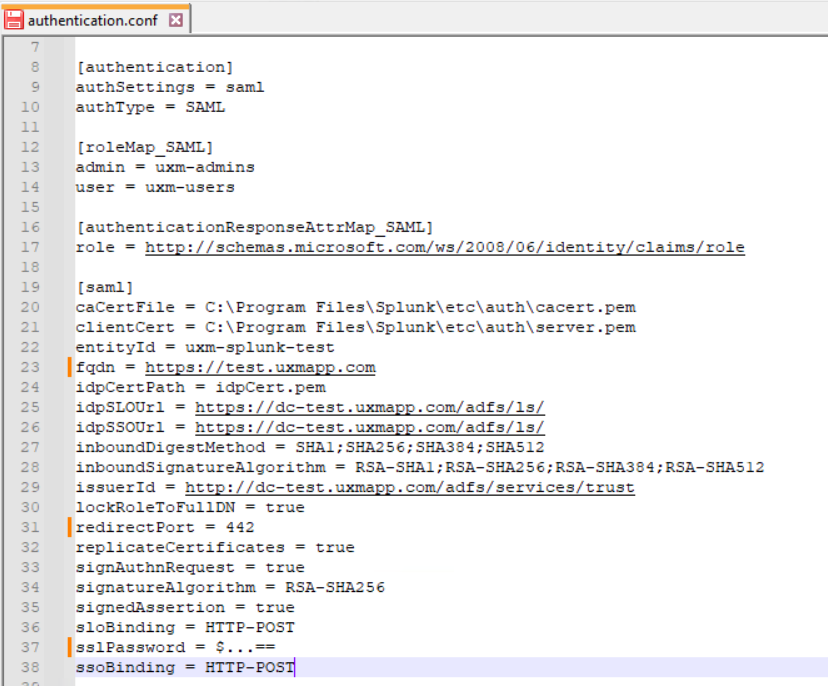
Export Splunk Metadata
-
Open:
https://fqdn/en-US/saml/spmetadataOR
-
Go to:
Settings → Authentication Methods → SAML → SAML Settings -
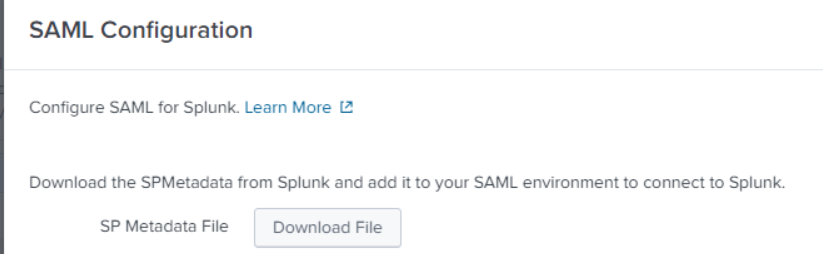
Click Configure SAML → Download File
Setup ADFS – Relying Party Trust
-
Add new Relying Party Trust
-
Select Claims aware
-
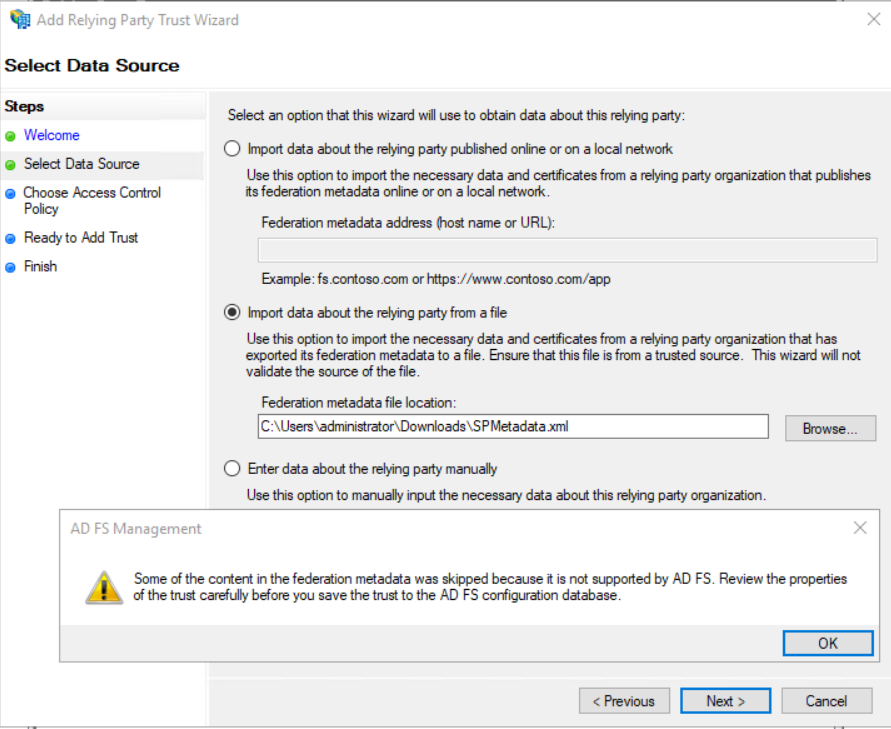
Import Splunk metadata file
Configure General Settings
- Display Name: UXM Splunk Test / Prod
- Notes:
ADFS SSO for UXM (Splunk) running at your URLhttps://customername.uxmapp.com/
Access Control
-
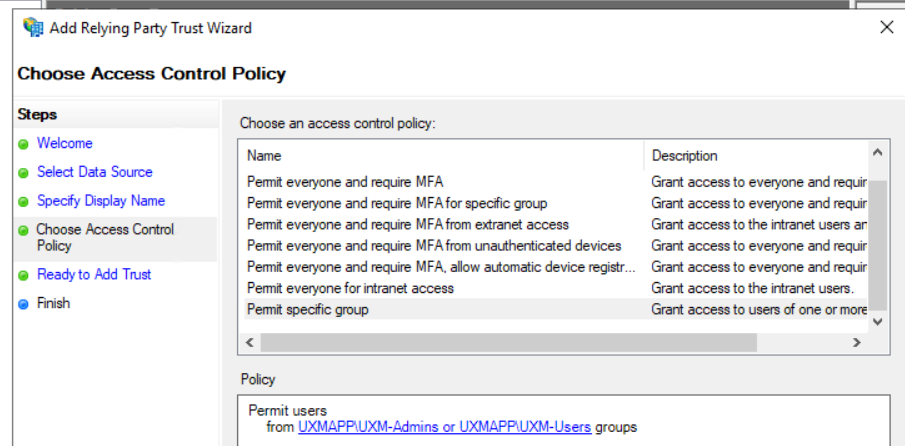
Allow required AD groups
-
Example groups:
- UXM-Admin
- UXM-Users
-
Groups can map to Splunk roles
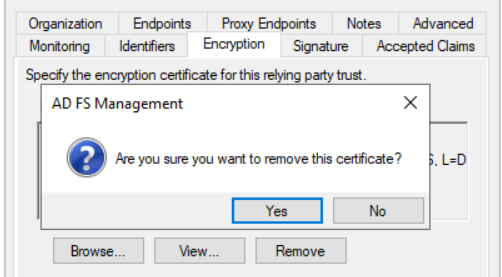
Remove Encryption
- Go to Encryption tab
- Click Remove and confirm
ℹ️ Data is still securely transmitted via HTTPS
Verify Identifiers
- Ensure identifiers match:
-
uxm-splunk-testor -
uxm-splunk-prod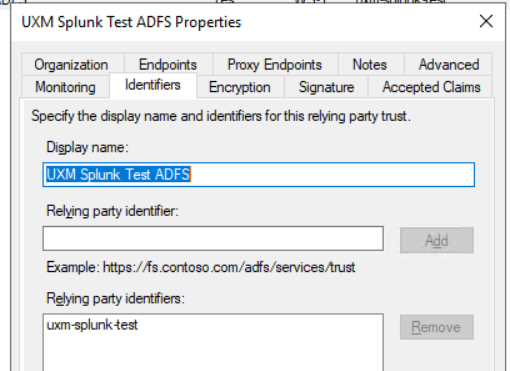
-
Configure Endpoints
- Go to Endpoints tab
- Verify POST bindings:
-
Assertion Consumer:
https://customername.uxmapp.com/saml/acs -
Logout endpoint:
https://customername.uxmapp.com/saml/logout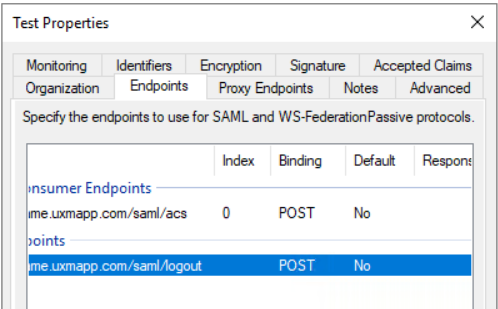
Save Configuration
- Click OK to save
Configure Claim Rules
-
Click Edit Claim Issuance Policy
-
Click Add Rule
-
Select: Send LDAP Attributes as Claims
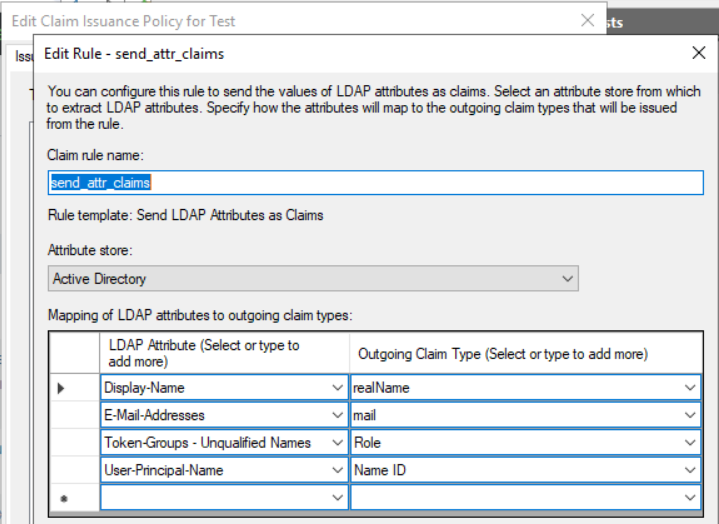
Claim Rule Configuration
- Name:
send_attr_claims - Attribute Store: Active Directory
Mappings:
- Display-Name →
realName - E-Mail-Addresses →
mail - Token-Groups (Unqualified Names) →
Role - User-Principal-Name →
Name ID
- Click OK and apply