Setup SAML in Azure Active Directory
Setup SAML in Azure Active Directory
Before starting, decide the following:
- Should all users or only specific users/groups access UXM?
- Should Splunk roles be automatically assigned based on Azure AD groups?
⚠️ Important
When using SAML login, all users receive the assigned Splunk role.
Multiple role assignments only work if the Role Alias maps to Azure AD groups.
Setup Enterprise Application in Azure AD
-
Go to: https://portal.azure.com
-
Navigate to:
Azure Active Directory → Enterprise Applications -
Click New application
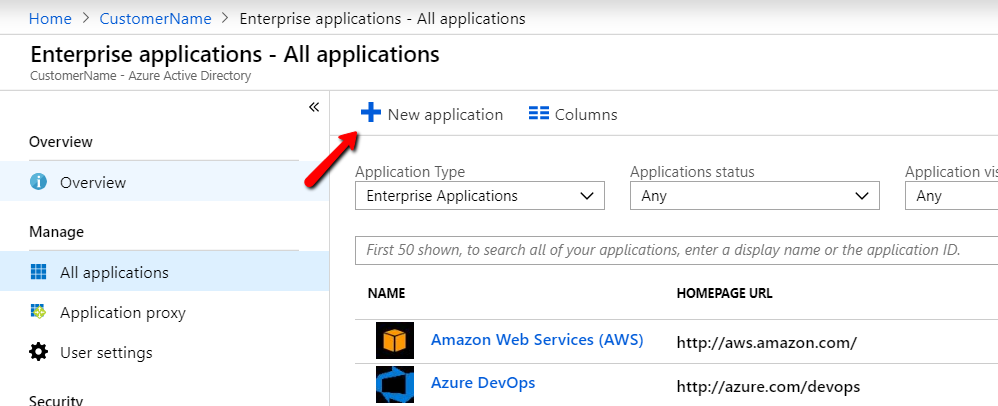
Add Splunk Application
-
Search for:
Azure AD SSO for Splunk Enterprise and Splunk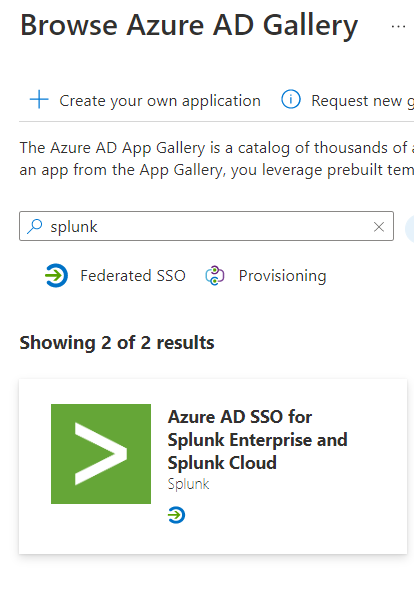
-
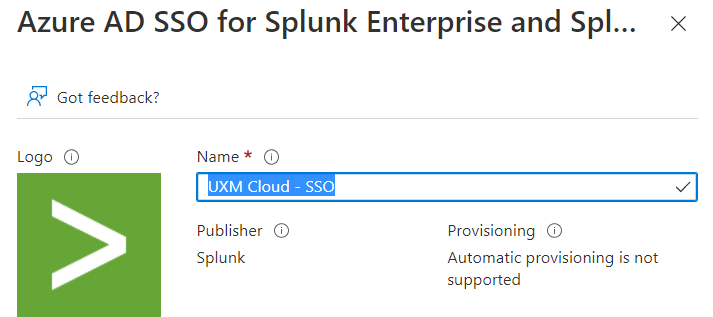
Enter name:
UXM Cloud - SSO -
Click Add
Configure Properties
-
Go to: Manage → Properties
-
Set User assignment required? to:
- No (allow all users)
- OR Yes (manually assign users/groups)
-
(Optional) Upload UXM logo:
https://repo.uxmapp.com/appIconAlt_2x.png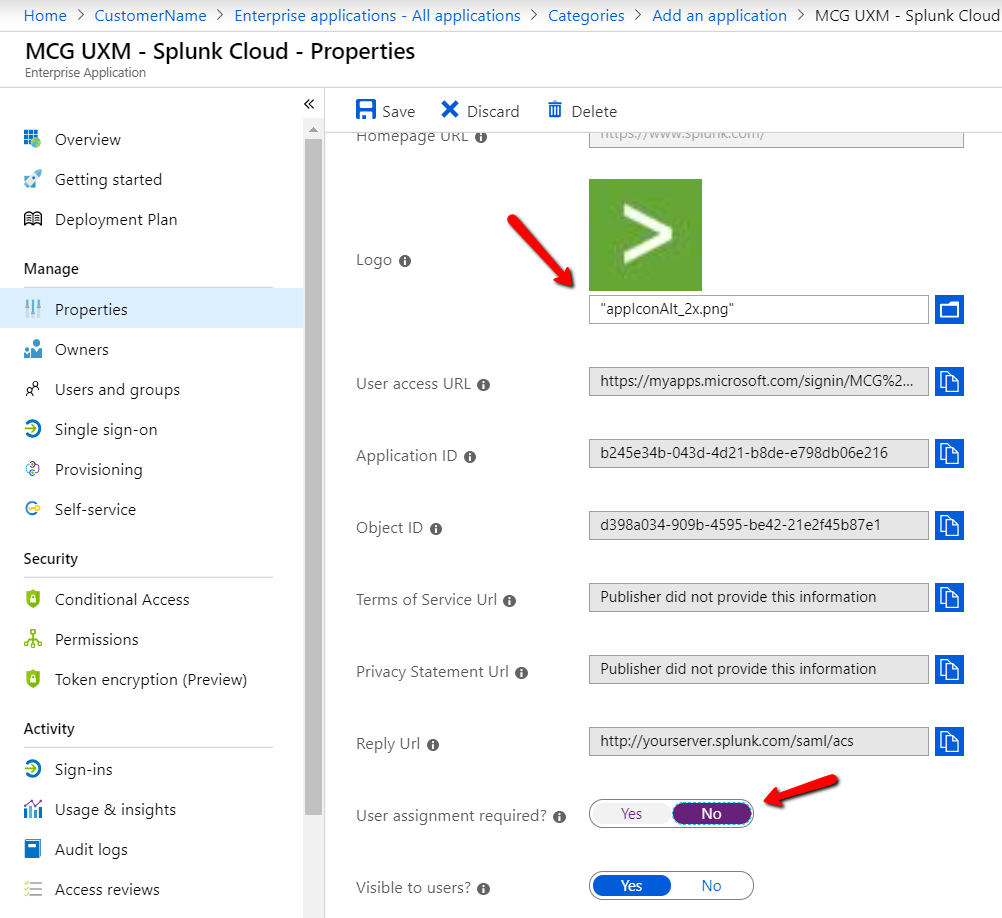
Configure SAML SSO
-
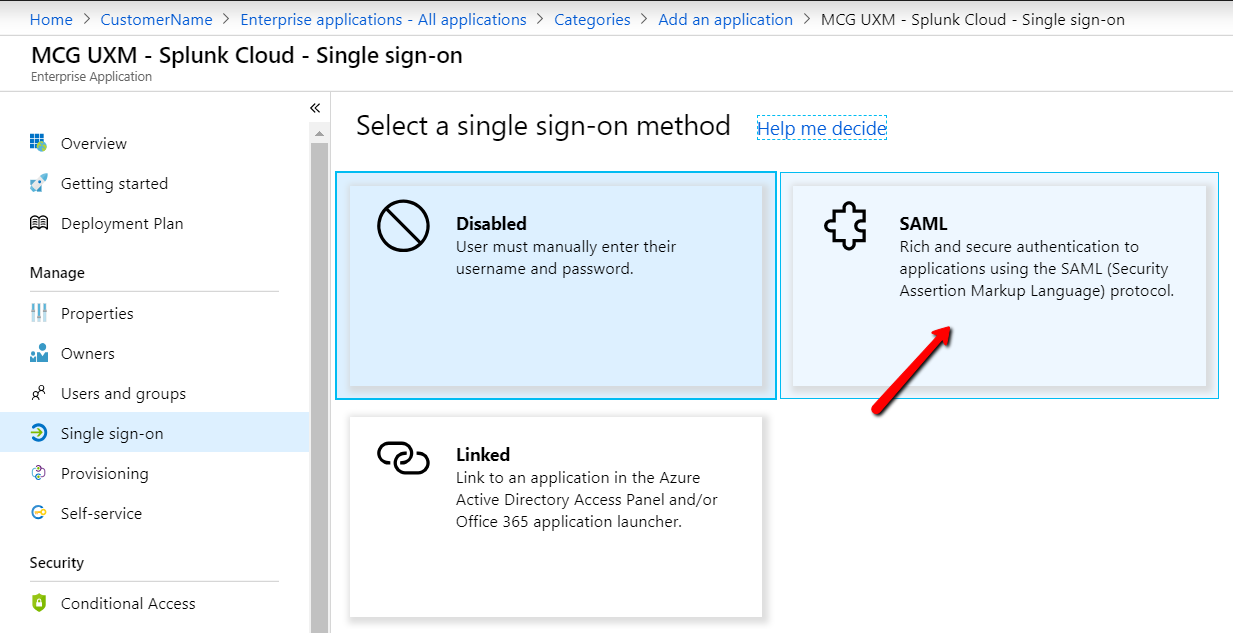
Go to: Manage → Single Sign-on
-
Select SAML
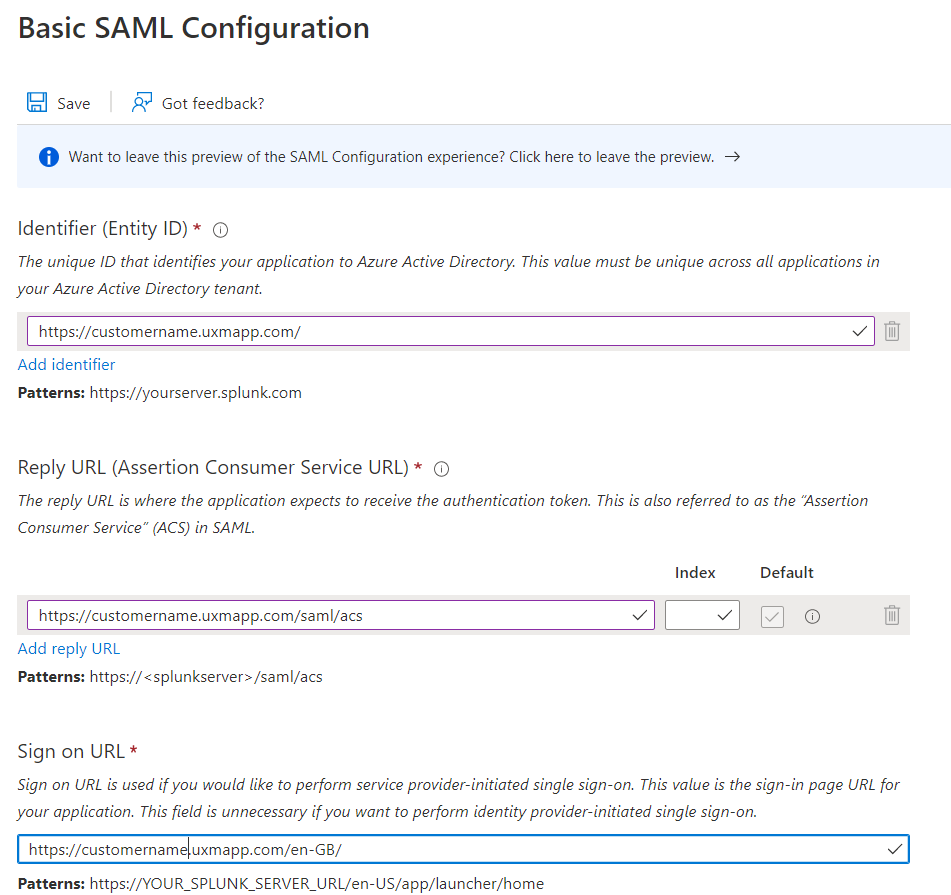
Basic SAML Configuration
Enter:
-
Identifier (Entity ID):
https://customername.uxmapp.com -
Reply URL (ACS):
https://customername.uxmapp.com/saml/acs -
Sign-on URL:
https://customername.uxmapp.com/en-GB/
or
https://customername.uxmapp.com/en-US/
-
Click Save
Configure User Claims
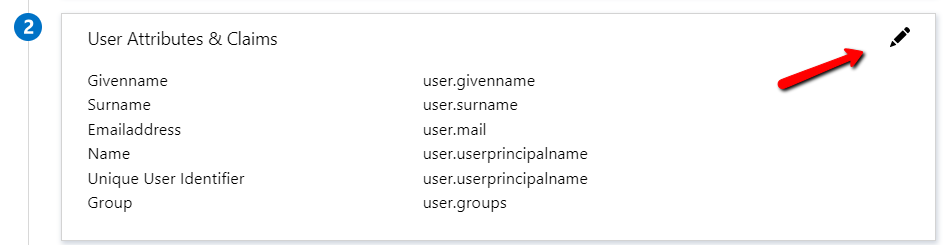
- Go to User Attributes & Claims
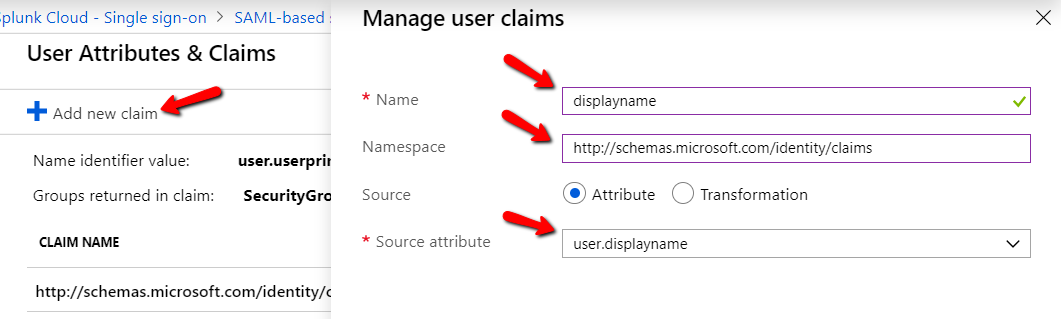
- Add the following claims:
| Claim Name | Namespace | Source Attribute |
|---|---|---|
| displayname | http://schemas.microsoft.com/identity/claims | user.displayname |
| companyname | http://schemas.xmlsoap.org/ws/2005/05/identity/claims | user.companyname |
| http://schemas.xmlsoap.org/ws/2005/05/identity/claims | user.mail |
-
Click Add new claim and configure each
Configure SAML Certificate
-
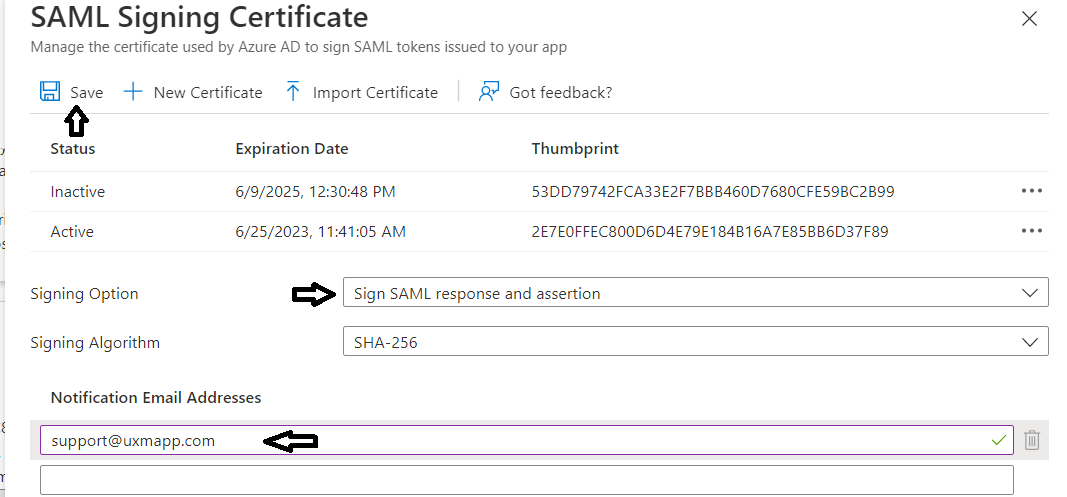
Go to SAML Signing Certificate
-
Set signing option:
- ✅ Sign SAML response and assertion
-
Add notification email:
support@uxmapp.com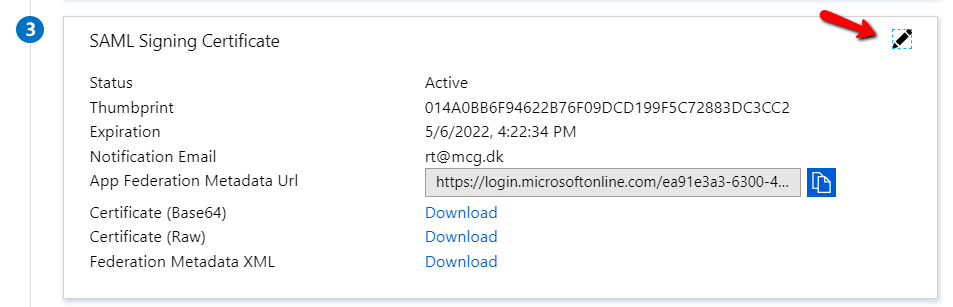
Export Metadata
-
Download Federation Metadata XML
-
Send to:
support@uxmapp.com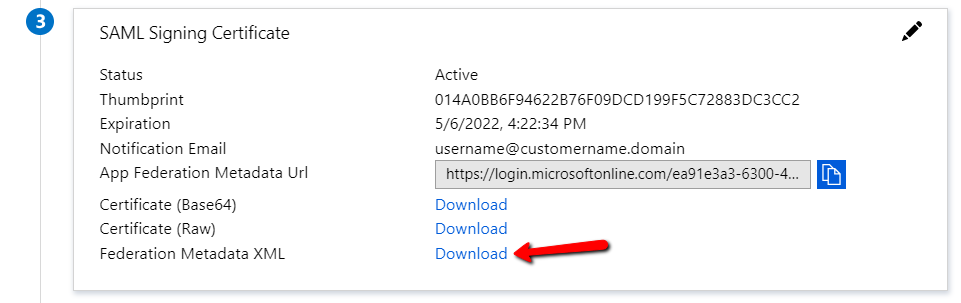
Setup SAML in Splunk
Requirements
- Ensure DNS is configured
- Or use local hosts file for testing
Configure SAML in Splunk
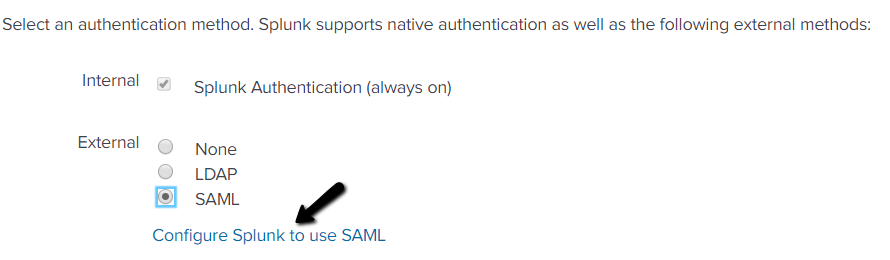
- Go to:
Splunk → Settings → Access Controls → Authentication Methods - Select SAML
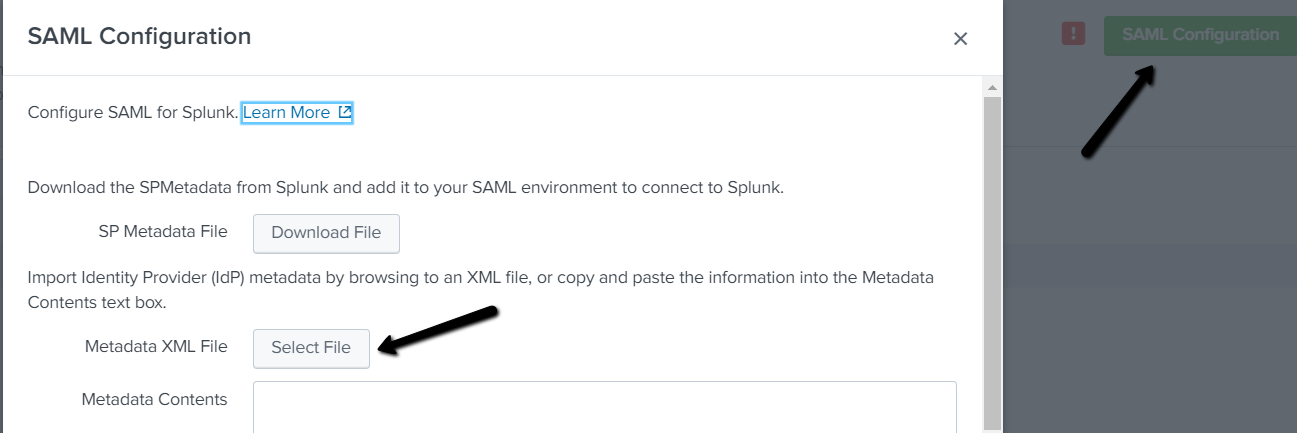
- Click Configure Splunk to use SAML
Import Metadata
-
Upload the Federation Metadata XML from Azure AD
Update Required Fields
-
Entity ID:
FQDN used for login -
Role Alias:
Must match Azure AD claim
Options:
-
Company:
http://schemas.xmlsoap.org/ws/2005/05/identity/claims/companyname -
Groups:
http://schemas.microsoft.com/ws/2008/06/identity/claims/groups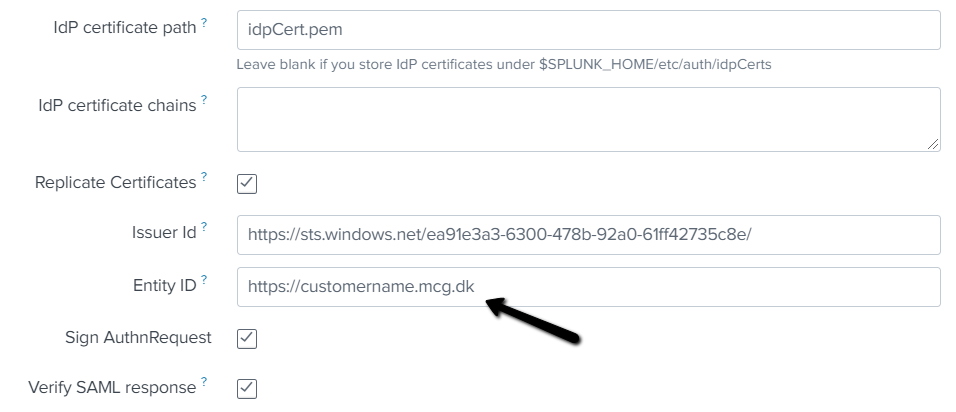
Additional Settings
-
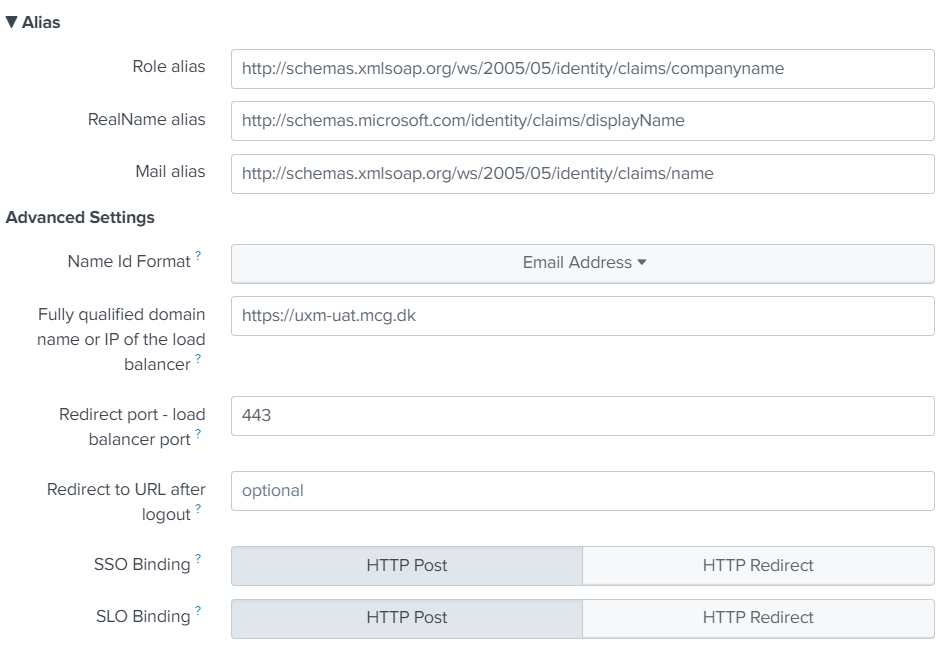
RealName Alias:
http://schemas.microsoft.com/identity/claims/displayName -
Mail Alias:
http://schemas.xmlsoap.org/ws/2005/05/identity/claims/name -
Name ID Format: Email Address
-
FQDN: same as Azure setup
-
Redirect Port: 443
-
SSO Binding: HTTP POST
-
SLO Binding: HTTP POST
Test Login
- Save configuration
- Test login in Incognito mode
Update Expired Certificate
- Certificate path:
$SPLUNK_HOME/etc/auth/idpCerts/idpCert.pem
- Valid for 3 years
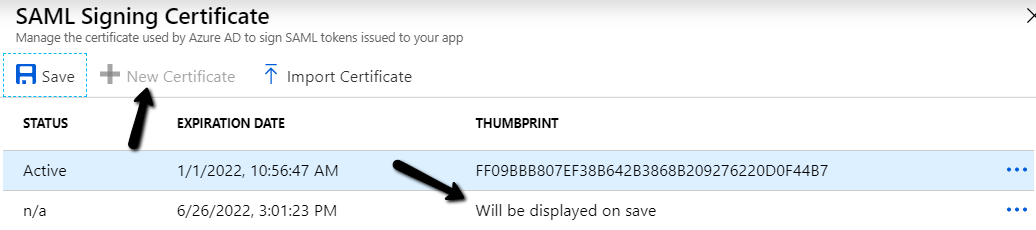
Generate New Certificate (Azure)
-
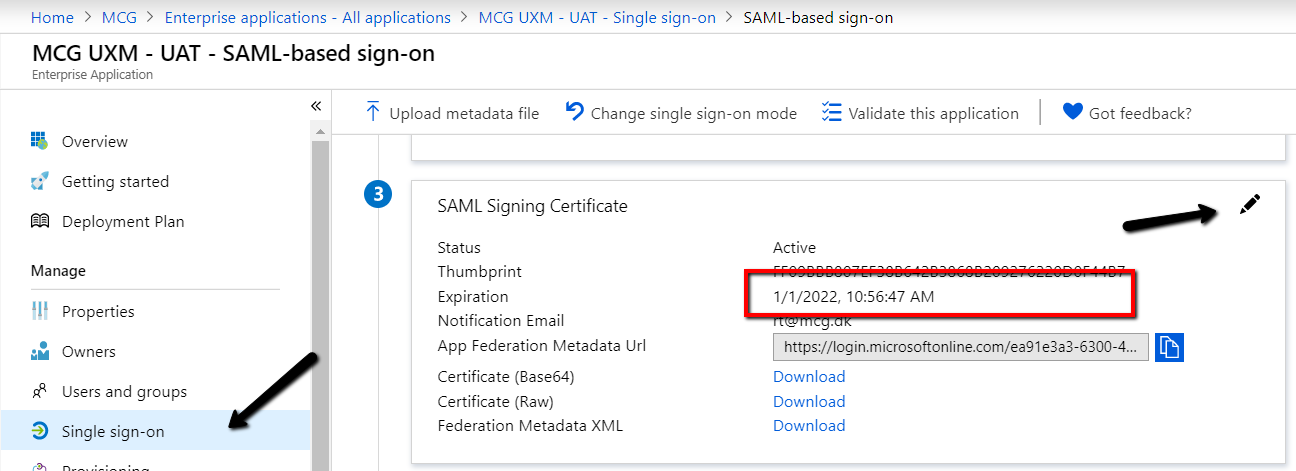
Go to Single Sign-on → SAML Signing Certificate
-
Click New Certificate
-
Download as Base64
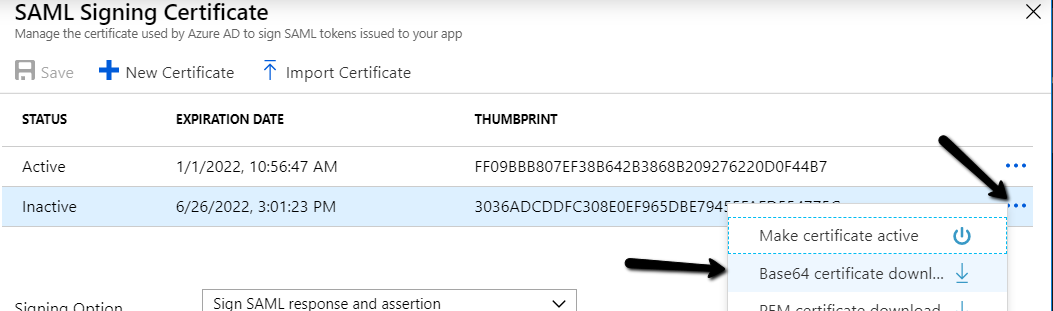
-
Set as Active
-
Delete old certificate
Upload Certificate
-
Send new certificate to:
support@uxmapp.com -
It will be updated in Splunk
-
No restart required
Troubleshooting
Multiple Certificates Error
There are multiple certs, idpCertPath:idpCert.pem must be a directory
-
Ensure only one active certificate in Azure AD
-
Or manually update
idpCert.pem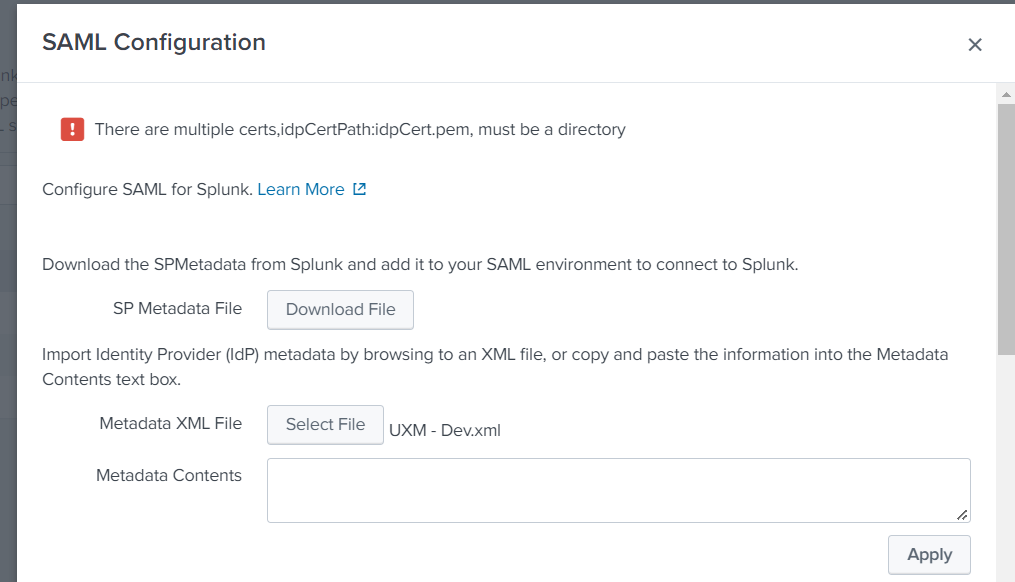
Extract Certificates Tool
https://www.rcfed.com/SAMLWSFed/MetadataCertificateExtract
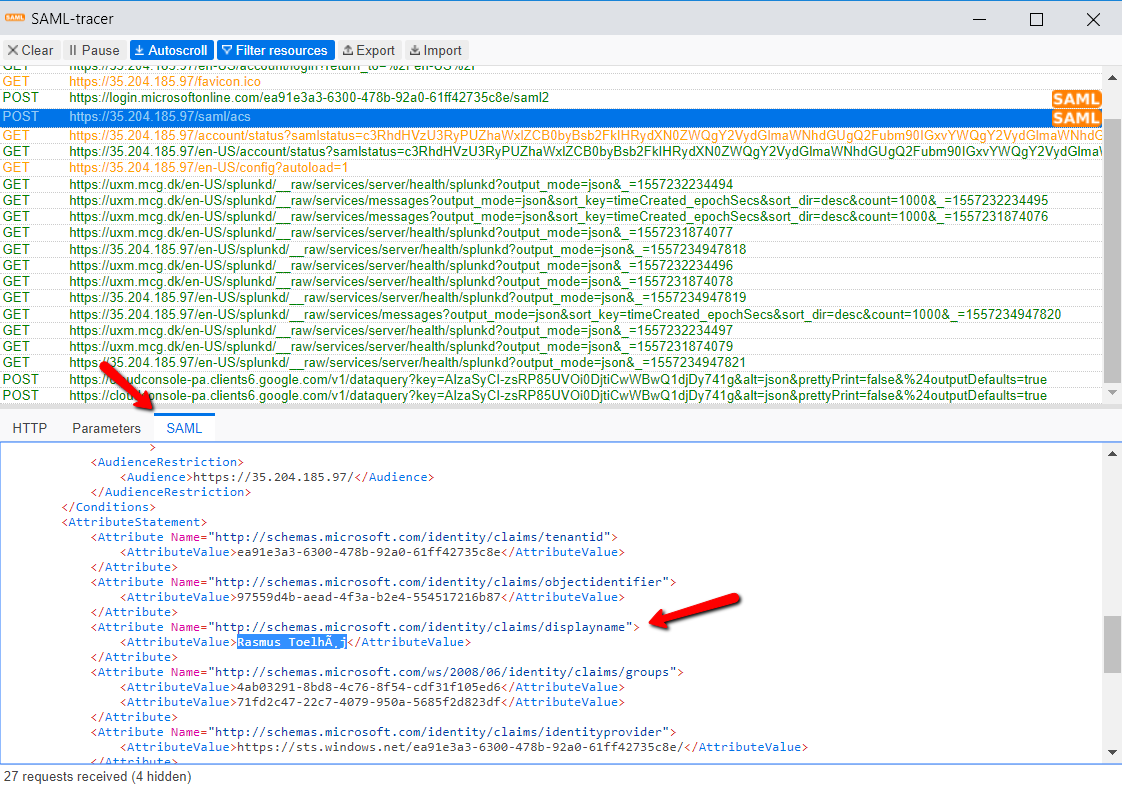
Login Debugging
-
Use SAML Chrome Plugin
-
Check attributes returned by Azure AD
Deleting Old SAML Users
To remove inactive users:
- Contact:
support@uxmapp.com - API endpoint:
https://customername.uxmapp.com:8089/services/admin/SAML-user-role-map/userId